Getting Started With CMake
Are you convinced yet? Well, if you are, that's great! If not, that's understandable too. Hopefully you'll stick around because we're getting to the good part now :)
Installing CMake
As mentioned before, CMake is usable on Windows, Mac, and most Linux distributions. Just to keep things brief, we shall link to the offcial downloads page and allow the user to select the right package/release.
CMake Official Release/Downloads Page
Installation Guides
The following is referenced from a NYU document on OpenGL Programs on macOS.
-
Install Homebrew:
To install Homebrew, simply paste the command from the Homebrew Webpage into your terminal and run. Once you have installed Homebrew, type “brew” in your terminal to check if it’s installed.
-
Install CMake:
To install CMake, simply type “brew install cmake” in the terminal. Once you have installed CMake, type “cmake” in your terminal to check if it’s installed.
Something goes here...
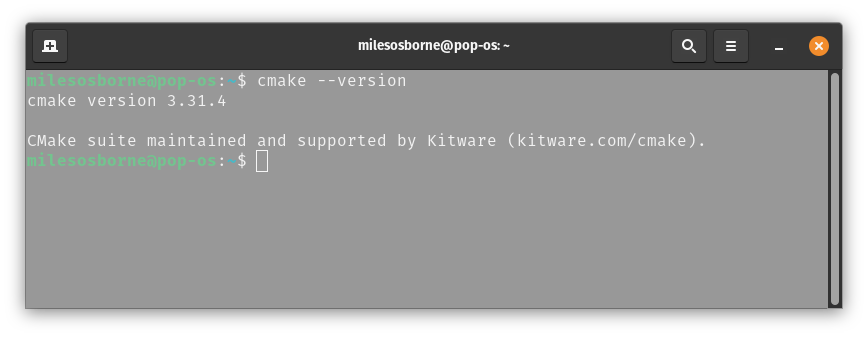
Once the installation process is complete, you can check your install by typing cmake --version in your preferred terminal environment
Note
At the time of writing, the current CMake version is 3.31.5.
Development Environment Setup
You do not need a specific development environment for CMake. Everything can be done from the command line. With that said, there are some nice features we can take advantage of by using a text editor or IDE. For the most part, the Penn Embedded Group uses VScode but CLion has recently become more popular with our members.
Note
Setting up a development environment to your preference is a worthwhile endeavour. You do not have to follow the setup in this section, but this should give anyone a starting point to ensure they are ready to complete this exercise and beyond.
“Good software engineers spend more time changing their themes than actually writing (good) code.”
Miles Osborne :)
VScode
VScode is an open source text-editor developed by Microsoft that is extremely popular for how customizable it is. It has a staggering amount of supported languages as well as neat features and gimmicks outside that go beyond developing software thanks to the amazing community suport. Unsurprisingly, theere are extensions for integrating CMake projects with vscode that you may want to take advantage of.
Extensions:
Alternatively, you can install the C/C++ Extension Pack which includes the recommneded CMake tools and some quality of life improvements for working with C/C++ files.
CLion
CLion is a cross-platform IDE developed by JetBrains with built-in support for CMake and its packages. It is a paid software, but students can use it for free via an academic license which will also give them access to all the JetBrains tools for free. This is a worthy mention due to its seamless integration when it comes to working with CMake projects. Despite the user interface presenting a slight learning curve, the debugging environment, refactoring tools, and interfaces are a lot more polished than the alternatives.
NOTE: CLion has historically been somewhat CPU and memory intensive. The newest release (CLion Nova) aims to reduce memory footprint and overall CPU usage.

Hello World Project
We'll revist this project in more detail during the next guide but let's make sure everything is working before proceeding. Let's consider this our equivalent of turning on an LED on a brand new development board. You can either use your preferred text editor/IDE to setup your project or click here to download the example project.
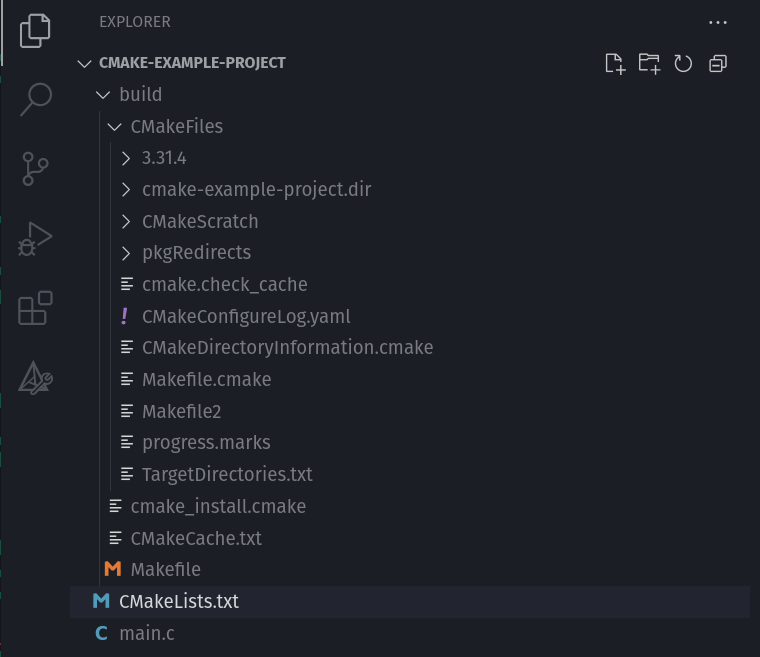
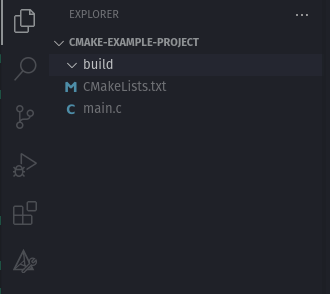
If you choose set up the project manually you should have a directory/project structure that looks like this:
If you're building the project manually, copy the main.c and CMakeLists.txt contents from the code blocks below into your local project. Otherwise, proceed to Building and Compilation
#include <stdio.h>

int main()
{
    printf("CMake build test project\n");
}
######################################
# CMake Example Project              #
######################################
cmake_minimum_required(VERSION 3.18.0)      # Minimum CMake version supported
project(CMake-Example-Prj                   # Project arributes
                    VERSION 1.0
                    LANGUAGES C CXX ASM)
set(CMAKE_C_STANDARD 11)                    # C standard utilized

add_executable(cmake-example-project)       # Create exeucatble target

# Add sources to target executable
target_sources(cmake-example-project PRIVATE main.c)
Building and Compilation
We're going to use the command line to build this project but note that you can always use the built-in interfaces & menus through your development tools. Sometimes, the latter is preferred!
Hint
Use the cd command to traverse directories in your terminal.
i.e. cd build to enter the build directory and cd ../ go up one level
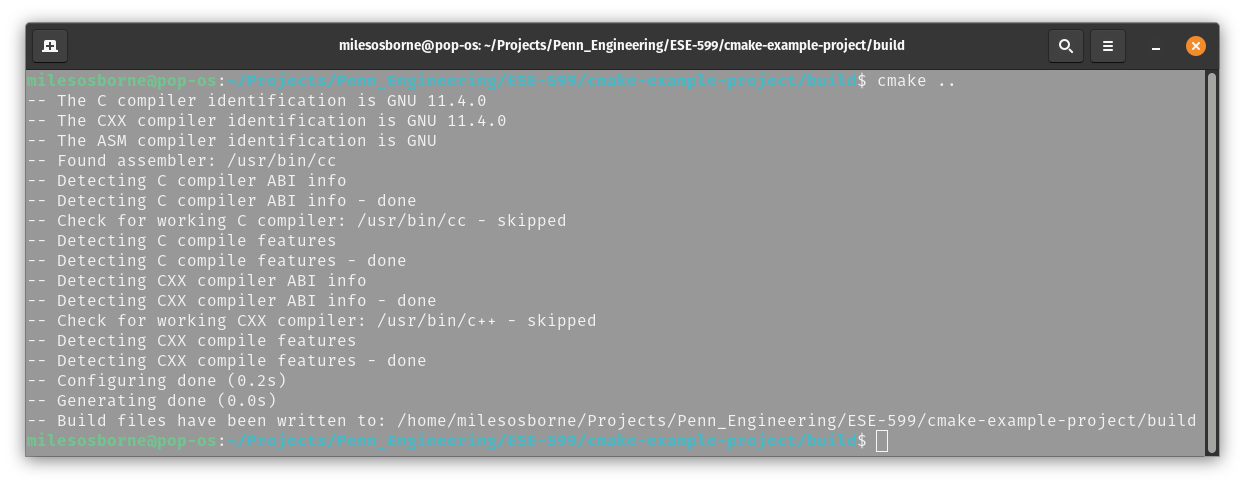
In your terminal navigate to the build directory and type the following commands. Don't worry we'll expalin what is going on later.
cmake ..
If the command is successful you should see an output somewhat similar to the screenshot below and new files populated in the build directory.