Build Systems Exercises - Part 1
Consider this more of a walkthrough than a exercise. We're still focusing on the basics so the objective is to make sure your development environment is set up, manage some dependencies/libraries, and refine the basic project structure. By the end of this exercise you should have the foundational knowledge needed to work with basic CMake projects.
If you feel confident in your CMake setup jump to section Section 3 - Textris in C.

1. Setting Up CMake (and Ninja)
For this exercise, the only software requirements are having CMake and a text editor or IDE installed that supports editing CMake files. As a bonus item, we would also like you to install another build system called Ninja. Ninja is like make in that it is generates a template file that tells the compiler how to build your application. There are more subtle and significant differences between the two but for the sake of the exercise they function almost identically.
- Before procedding make sure your CMake is properly installed and that you have your text editor or IDE setup for a CMake project
- (Optional) Download the Ninja build system from the official ninja-build GitHub Repository Releases page
2. CMake Hello World
We introduced the basic hello world example in the previous guides. Before proceeding, make sure you can build the hello world example with CMake and get the expected output when executing the program.
Note
See Getting Started with Cmake - Hello World Project for reference!
3. Textris in C!
The goal of this exercise is to compile a demo application using CMake. For this we shall build "textris", a text-based tetris clone written in C!. In fairness you could use any C application for this step but we want to limit the complexity to the CMake files instead of dealing with an equally complex project.

Text Tetris (Textris) in C!
3.1 Downloading the starter code!
- Get started by downloading the starter code from here and opening the repository in your development environment of choice
You should see a few folders similar to the project structure presented in the previous guide as well as a few other artifacts relevant to this project.

Text Tetris (Textris) in C!
Note
As stated above, all the source code has been given to you. Feel free to modify the source files as you please but understand that modifying them is not required for this exercise.
4. Updating Top Level CMakeLists.txt
4.1 Project Attributes and Metadata
Our first step is updating the top-level CMakelists.txt file with our project attributes. If you remember from the Getting Started with Cmake guide, every CMake project needs a top-level CMakelists.txt file with a few items defined minimum:
- the minimum cmake version required
- the project name and supported languages
- the C/C++ version standard
The common converntion is to define these items at the top of the top-level CMakeLists.txt file which will be our first step.

At the the top of the file in root/CMakelists.txt there are a few TODOs for the project attribute items we noted above. Take a moment to fill in the fields for the project attributes. The CMake functions that set these items have already been defined for you.
- Set the minimum CMake version to 3.18.0
- For the project function on line 13:
- Set the project name to "textrix_app"
- Set the project version to 1.0
- Add C to the list of supported languages
- Set the C/++ standard to C++ 11 by setting the
CMAKE_C_STANDARDvariable to the value 11
4.2 Setting up the Executable Application
Once we have the project metadata set up we can add our executable/application target. Just like before, there a few more TODOs listed underneath the section you just completed for adding our executable target.

- Add an executable target called "textris" via the
add_executable()function - Using the target_sources function, add the src/main.c file to
textristarget define din the previous step
NOTE: When adding target sources, set the scope of the visibility to `PRIVATE
target_sources (<target> PRIVATE <list of source files>)
4.3 Doing a Test Compile
It's good practice to frequently compile your code (and save it as well). We aren't done setting everything up yet so it should be unsurprinsging if we get compilation errors. However, it's the type of errors that we get that we should be more interested in. Although the project is relatively simple, the compilation process should properly detect and try to process the main.c file. However, it will immediately error when we try to include and of the header files under the /lib subfolders. We want to confirm that when we compile we get error messages related to missing header files and not a lower level issue.
- Create a build output directory labeled "build"
- Navigate to the build directory and run the following command:
cmake .. -GNinja - Using your project's specific generator (likely
makeorninja) compile the build artifacts. We are expecting a failed build You should see a similar error message to the one below:
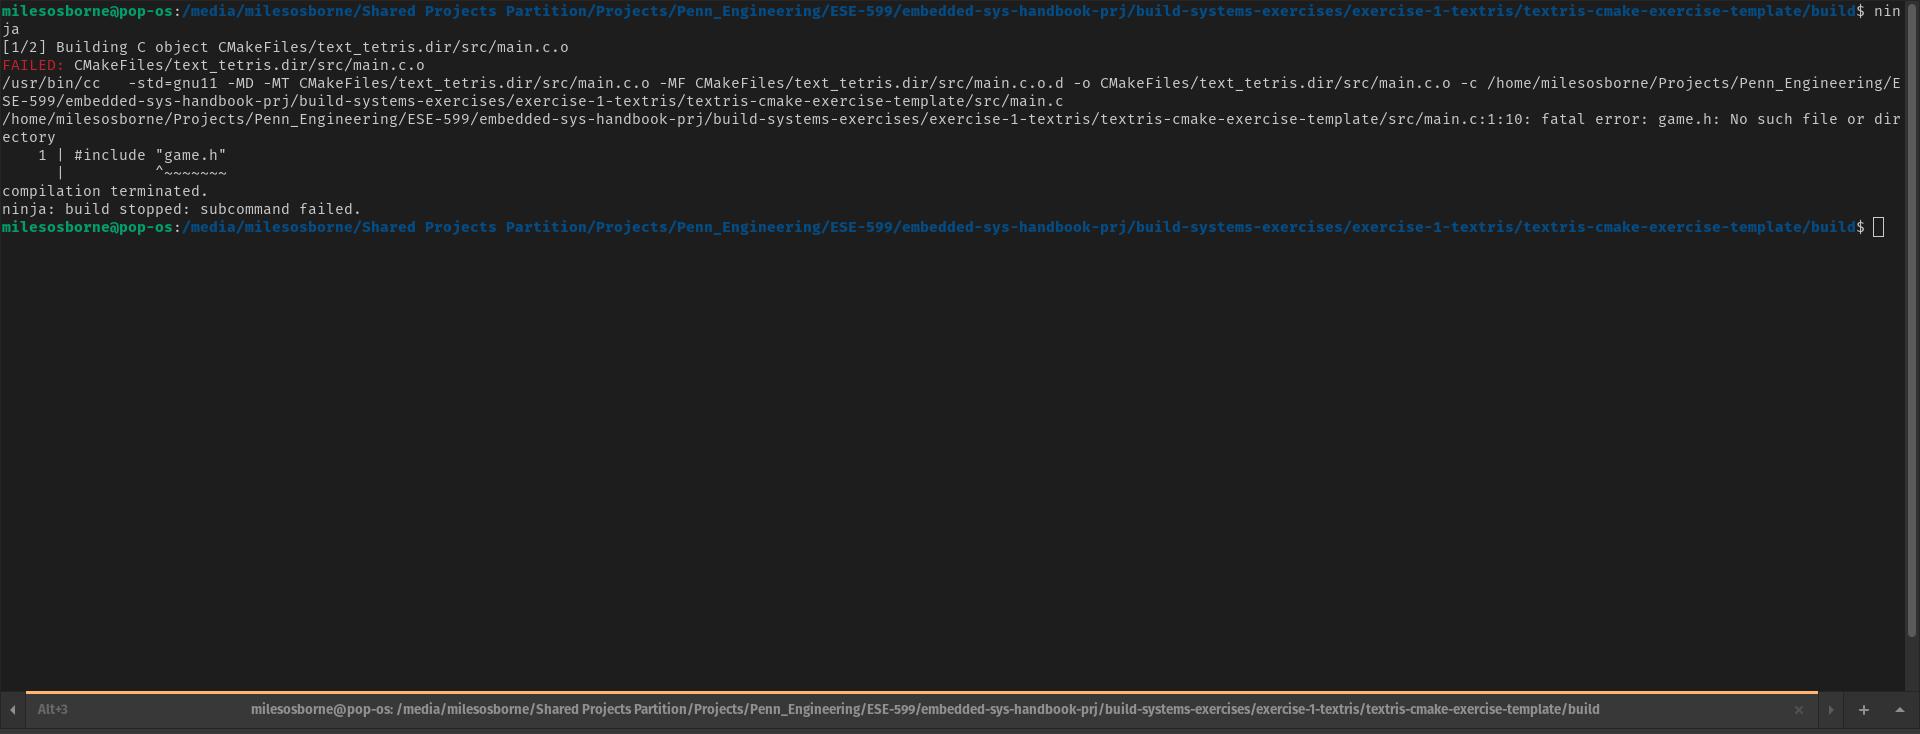
NOTE: If you do not have Ninja installed or plan on using gnu make then omit the -G argument and type: cmake ..
5. Adding libraries
We are nearing the end. The last step of this execrise is to create the libary targets and then link them either to each other where necessary and to the executable application target. There are five libaries we need to create for this project to properly compile:
- board
- game
- input
- render
- tetromino
Note
According to wikipedia, a tretromino is a geometric shape composed of four squares, connected orthogonally!
Each library is given its own subfolder under the lib directory. To keep the project structure simple, the source and header files are kept together instead of being palced in separate locations.
5.1 Creating the Library Targets:
In each library subfolder, there shall be a CMakelists.txt file. This is where you should define your library targets. Since we are working with a typical library structure where there are source and header files, we want to create STATIC library targets.

Do the following before proceeding to the next section:
For each CMakeLists.txt within each library subfolder:
- Define a static library target with the name of the library target as the name of the subfolder
- Add the respective source file to the library target via
target_sourcesfunction - Add the current directory to be searched for header files via
target_include_directoriesfunction
5.2 Making Library Targets Visibile Throughout the Project
Now that we have the library targets defined, the next question should be how can we show or link the libraries throughout the rest of the project. That is done through the add_subdirectory function. From your top-level CMakeLists.txt file simply call this function and pass in the path of each library subfolder. It should look something like:

Note
NOTE FOR MILES: It might be worth including/making a diagram on how add_subdirectory handles dependencies. In a sense it's bidirectional or branching maybe? Maybe it's specified through a default library property?
5.3 Linking the Library Targets
By adding the library targets via the add_subdirectory function, all the library targets are visible to the executable target and vice versa. All that is left is to instruct CMake to link the libraries together. This will result in the linker knowing which libraries have dependencies that need to be satisfied in order to succeessfully compile.
There are three places where we need to link libraries:
- In the top level CMakeLists.txt file. All the project libraries need to be link to the application target
- In the render library CMakeLists.txt file - The render library needs to be linked to the tetromino library
- In the game library CMakeLists.txt file - The game library needs to be linked to the other four libraries (render, input, board, and tetromino)
Final Build and Output
Go ahead and try to build and compile your project now. IF everything ise setup correct you should not get any error messages on both the cmake and compilation steps. Enjoy your game of tetris!